

Why Concrete Slab Repair Matters for Tampa Homeowners
Concrete slab repair is essential for maintaining your home’s safety, value, and structural integrity. Here are the most common repair methods based on damage type:
Quick Repair Guide:
- Hairline cracks: Use concrete crack filler with caulking gun
- Wide cracks: Undercut edges, apply patching compound with trowel
- Spalling: Clean area, apply vinyl patching compound, smooth surface
- Sunken slabs: Professional slabjacking or polyjacking required
- Extensive damage: Resurfacing or complete replacement needed
Concrete is durable, but even the toughest slabs develop problems. Cracks create tripping hazards and let water seep in, causing more damage, while spalling makes surfaces rough and unsafe. Ignoring these issues doesn’t make them go away. Small problems become expensive repairs when left untreated, as water infiltration can damage your home’s foundation and uneven surfaces become serious safety hazards.
The good news is that most concrete problems are fixable when caught early. The right repair approach can restore your slab to like-new condition, whether you’re dealing with minor surface cracks or major structural issues.
As John Doron, owner of Salt & Pepper Construction, I’ve helped countless Tampa homeowners tackle concrete slab repair projects ranging from simple crack filling to complete patio resurfacing. My experience in home renovation has shown me that addressing concrete issues early saves both money and headaches down the road.
Diagnosing the Damage: What’s Wrong with Your Slab?
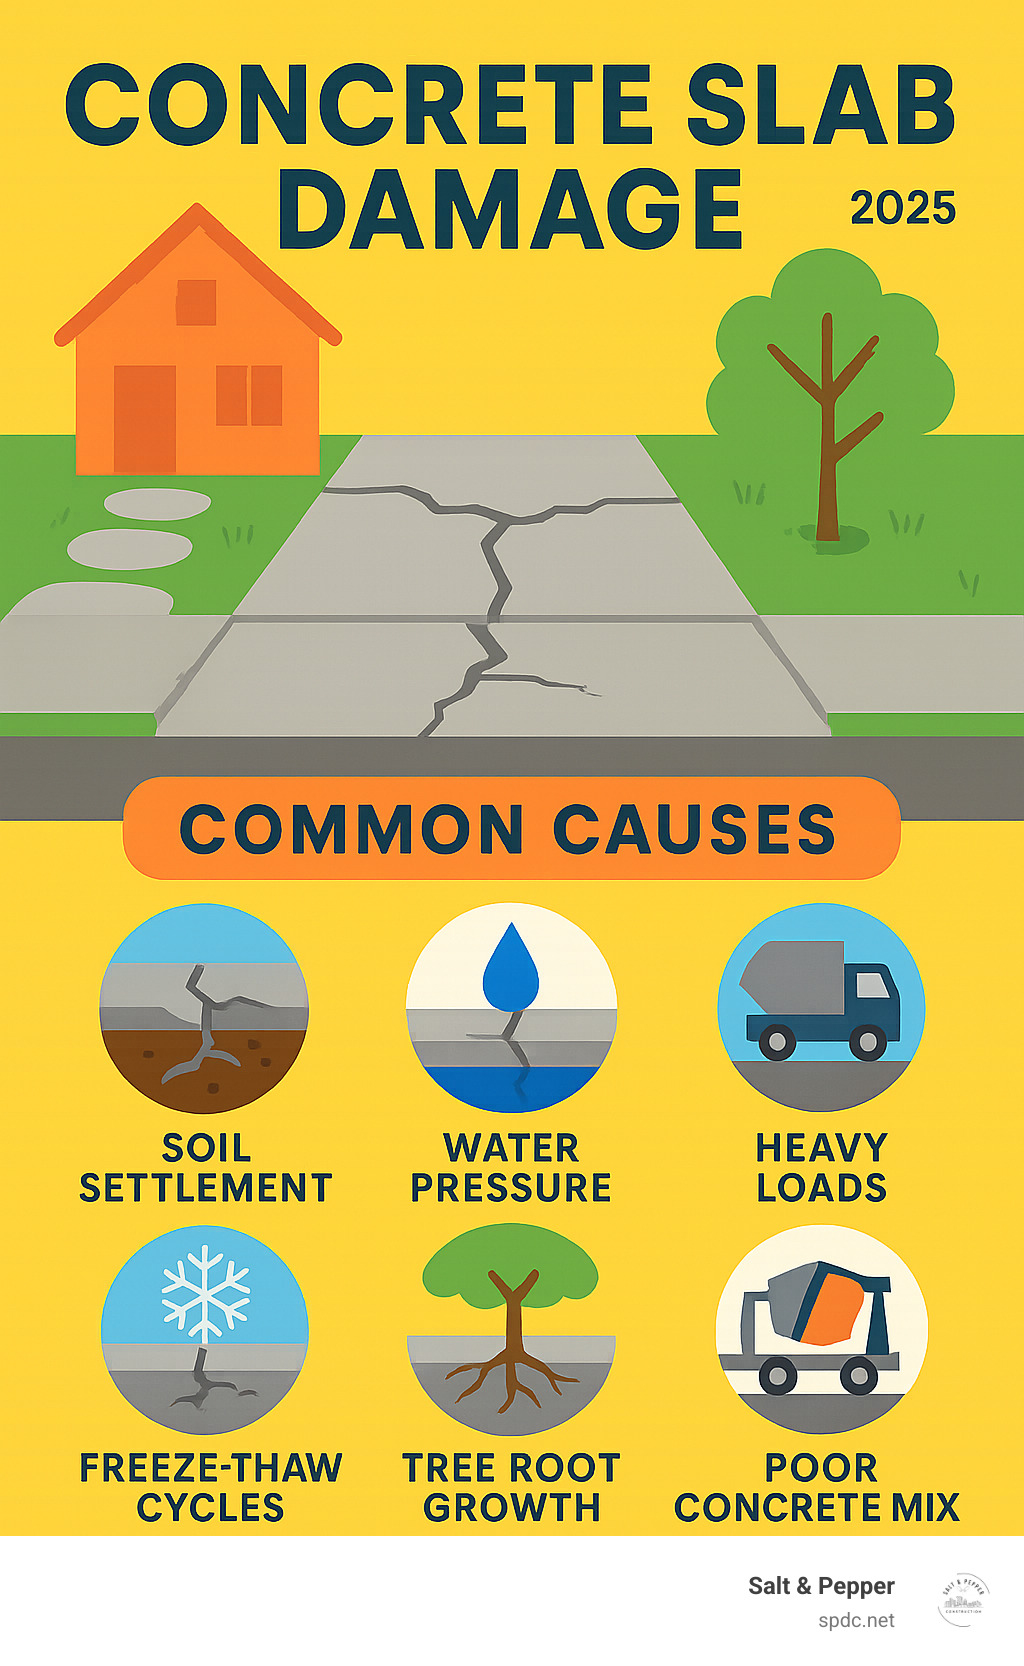
Before starting any concrete slab repair, it’s crucial to understand the root cause of the problem. Simply patching a crack without knowing why it appeared is a temporary fix at best. In Tampa, our unique climate and soil conditions present specific challenges. Our clay-heavy soil expands and contracts with wet and dry seasons, and intense summer heat creates its own set of problems. The way you use your concrete also matters; a heavily used driveway develops different issues than a quiet patio. Understanding these factors is key to choosing the right repair.
Common Causes of Concrete Damage
Concrete is incredibly strong, but it’s not magic. Several factors can gradually weaken even the best-installed slabs over time.
Soil settlement is probably the biggest troublemaker we encounter. The ground under your concrete can compress, shift, or wash away over time, especially during heavy rains. When the slab loses support, it cracks or sinks. This is a common issue in Tampa, Clearwater, and Riverview due to our variable soil composition.
Water damage works slowly but relentlessly. Water getting under your slab can wash away supporting soil or create upward pressure. Even small cracks allow water intrusion, starting a cycle of erosion that worsens the problem. While we don’t see freeze-thaw damage much in Florida, areas with cold winters deal with water expanding and contracting in cracks, which can split concrete apart.
Sometimes the problem starts on day one with poor concrete mix or installation. If the original concrete wasn’t mixed properly, poured thick enough, or didn’t have adequate reinforcement, it’s fighting an uphill battle from the beginning. This is why working with experienced professionals matters so much – they know how to set your concrete up for long-term success.
Heavy loads can overwhelm even good concrete. Your driveway might handle your family car just fine, but park a loaded moving truck on it repeatedly, and you might see new cracks appear. Every concrete slab has limits, and exceeding them leads to structural damage.
Tree roots are nature’s concrete crackers. As trees mature, their roots spread out looking for water and nutrients. When they grow under your slab, they create incredible upward pressure. We’ve seen beautiful oak trees cause thousands of dollars in concrete damage – it’s heartbreaking but surprisingly common.
Plastic shrinkage happens when new concrete dries too quickly, usually during hot, windy days. These hairline cracks might seem minor, but they create entry points for water and can indicate that the concrete wasn’t cured properly.
Types of Concrete Slab Damage
Once you know what to look for, identifying different types of damage becomes much easier. Each type tells a story about what went wrong and points toward the best repair strategy.
Hairline cracks are the most common issue homeowners notice. These thin lines, usually less than 1/8 inch wide, typically stay at the surface level. While they’re often just cosmetic from normal concrete shrinkage, they shouldn’t be ignored completely. Water can seep through even tiny cracks and start causing bigger problems over time.
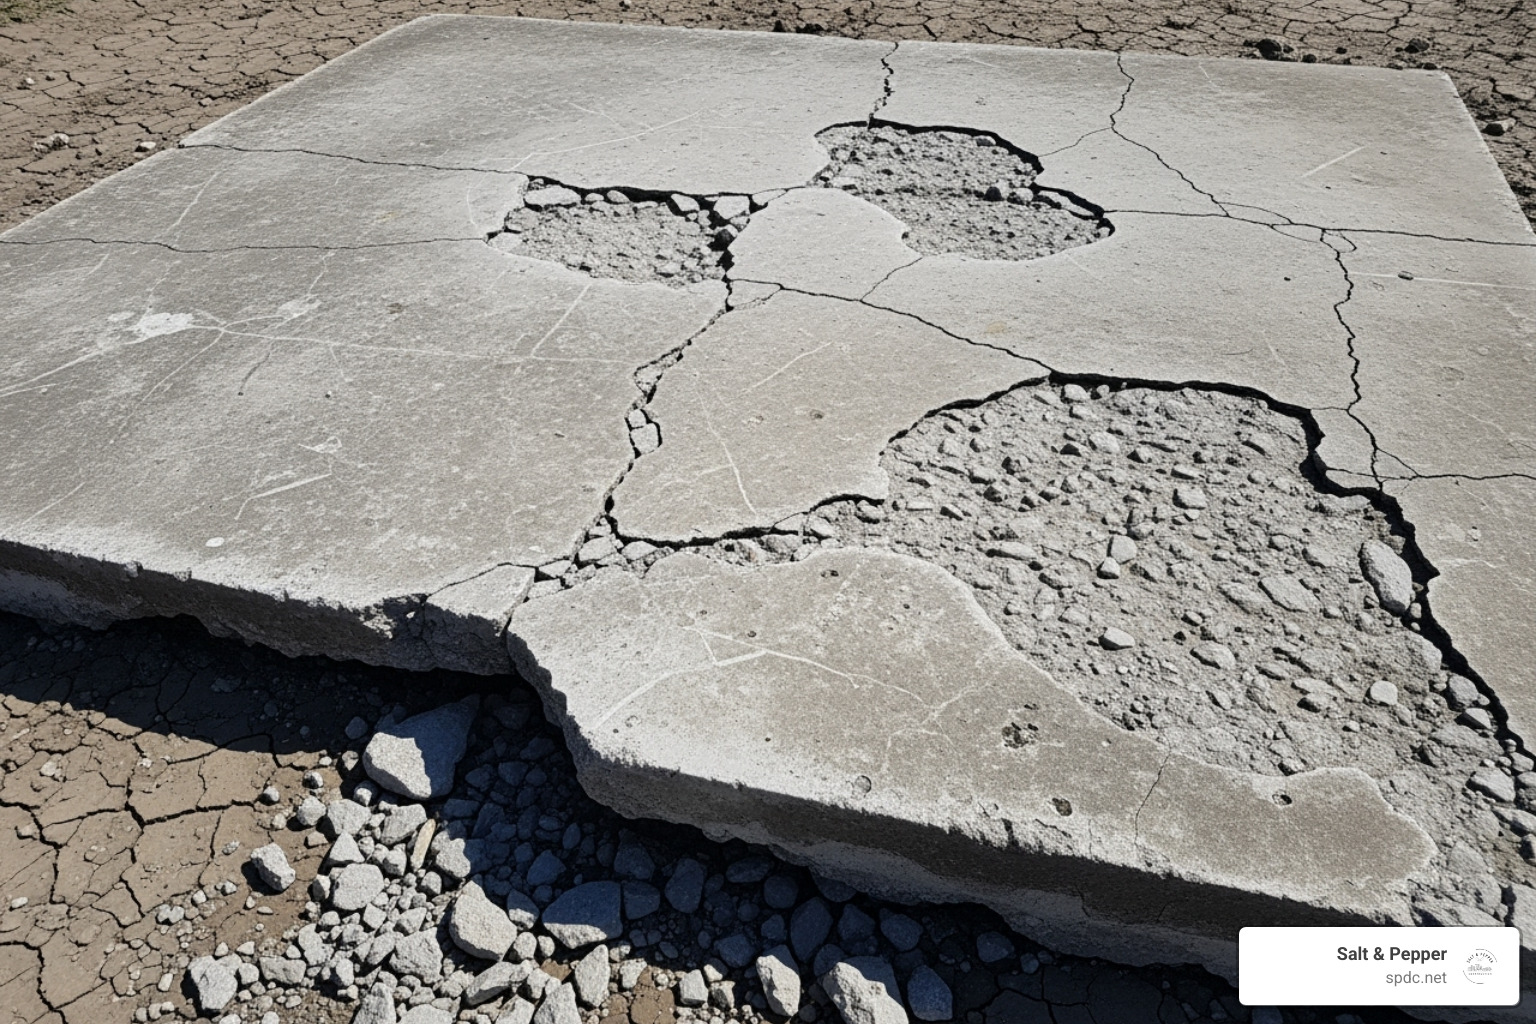
Structural cracks are the serious ones. These wider, deeper cracks go all the way through your slab and often indicate major underlying issues like soil settlement or excessive weight. When you see structural cracks, it’s time for immediate concrete slab repair to prevent further damage to your property.
Spalling looks like your concrete is flaking apart or crumbling at the surface. This creates rough, uneven areas that can be unsafe to walk on. It’s often caused by water damage, chemical exposure, or poor finishing when the concrete was originally installed.
Heaving means your concrete is moving upward, usually because the clay soil underneath has absorbed water and expanded. You’ll notice raised areas or humps in what should be a flat surface. This is particularly common during Tampa’s rainy season when our clay soils get saturated.
Curling specifically affects the edges of slabs, causing them to lift up. This happens when the top and bottom of the concrete experience different temperatures or moisture levels, creating uneven expansion and contraction.
Sunken slabs are the opposite of heaving – sections drop down when the supporting soil underneath compresses or washes away. This creates trip hazards and can put stress on anything attached to the concrete. When you’re dealing with significant settlement issues, you might need Foundation Repair Services in Tampa to address the underlying structural problems.
Getting the diagnosis right is crucial for successful repairs. Each type of damage requires a different approach, and understanding what you’re dealing with helps ensure your concrete slab repair will last for years to come.
A Step-by-Step Guide to Concrete Slab Repair
Many concrete slab repair projects are manageable for a DIY-er with patience and the right tools. Before you begin, prioritize safety. Concrete work involves rough surfaces, chemicals, and dust, so always wear proper gear. The secret to a long-lasting repair is surface preparation. Without cleaning and prepping the surface correctly, even the most expensive patching compound will fail.
Essential Tools and Materials for Concrete Slab Repair
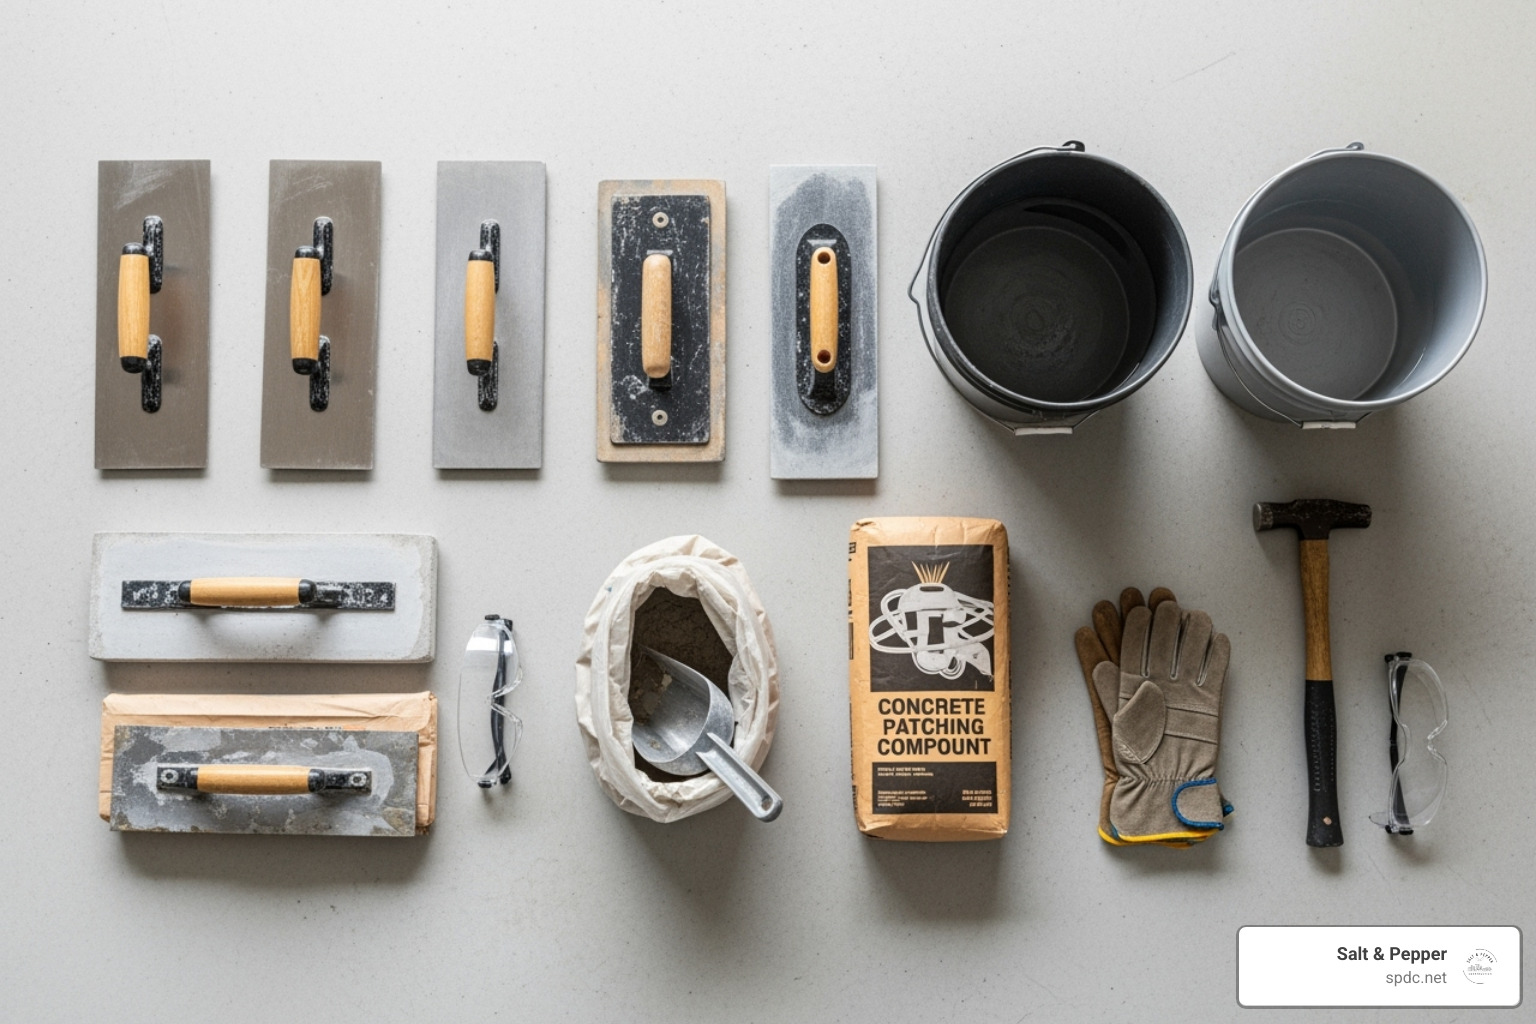
Getting the right tools before you start will save you multiple trips to the hardware store. Here’s what you’ll need for most concrete slab repair jobs:
Safety comes first. Grab some safety glasses to protect your eyes from flying debris and chemical splashes. Heavy-duty gloves are essential – concrete is rough on your hands, and many repair products contain chemicals you don’t want on your skin. A dust mask is crucial when you’re grinding, chiseling, or mixing materials. Concrete dust isn’t something you want to breathe.
For cleaning and prep work, you’ll need a wire brush for scrubbing out cracks and removing loose material. A chisel and small sledgehammer help widen cracks and remove damaged sections. Keep a stiff broom or shop vacuum handy for thorough cleaning. If you have access to a pressure washer, it’s fantastic for deep cleaning stubborn dirt and grime.
When it comes to application tools, a good trowel and putty knife are your best friends for applying patches and creating smooth finishes. A caulking gun works perfectly for applying crack fillers from tubes. For larger areas, you’ll want a darby or large float for initial smoothing.
Now for the actual repair materials. Concrete crack filler in tubes works great for hairline cracks – products like Sikaflex Self-Leveling Sealant are excellent for horizontal joints. For wider cracks and spalling, you’ll need vinyl concrete patching compound or cementitious patching mortar. A concrete bonding agent improves adhesion between old and new concrete. For widespread damage, concrete resurfacer like Sakrete Flo-Coat can give your entire slab a fresh new surface.
Repairing Minor Cracks and Spalling
Small cracks and surface damage might look intimidating, but they’re actually pretty straightforward to fix. The key is taking your time and doing each step properly.
Start with thorough cleaning. This isn’t optional – it’s the foundation of a successful repair. Use your wire brush to scrub out every bit of loose concrete, dirt, and debris from the crack. Be aggressive here. If material comes out easily with the wire brush, it would have failed later anyway. For deeper cleaning, break out the pressure washer. The crack needs to be completely clean for your repair material to bond properly.
For cracks wider than a hairline, undercut the edges using your chisel and hammer. This means making the bottom of the crack wider than the top, creating a “V” shape. It sounds counterintuitive, but this gives your patching material something to grab onto – like a mechanical lock that prevents it from popping out later.
Applying the patch depends on what type of crack you’re dealing with. For hairline cracks, load up your caulking gun with crack filler and apply a steady bead along the entire length. Make sure it fills the crack completely, then smooth it with your putty knife.
For wider cracks or spalled areas, vinyl patching compound works wonderfully. Apply it with your trowel, pressing firmly to fill all voids and eliminate air pockets. If you’re using cementitious patching mortar, mix it exactly according to the manufacturer’s instructions and add bonding agent if required.
Smoothing the surface is where your repair either blends in seamlessly or sticks out like a sore thumb. Use your trowel to make the patch flush with the surrounding concrete. Try to match the existing texture – if the rest of your slab has a broom finish, drag a clean broom lightly across your fresh patch.
Proper curing makes or breaks your repair. After the patch sets (check your product instructions – some are fast-setting), keep it moist for several days. Mist it with water and cover with plastic sheeting. This prevents it from drying too quickly and developing new cracks. For detailed guidance on specific repair techniques, check out Repairing Common Concrete Slab Problems.
Resurfacing for Widespread Surface Damage
When your concrete slab looks tired and worn with multiple small cracks, extensive discoloration, or widespread spalling, resurfacing can work miracles. It’s like giving your slab a complete makeover without the expense of replacement.
Surface preparation is even more critical for resurfacing since you’re covering the entire area. Power wash the entire slab to remove all dirt, grime, oil stains, and loose concrete. Any deep damage larger than 1/4 inch should be patched first and allowed to cure completely. The goal is to achieve what we call “saturated surface dry” – the concrete should be damp but with no standing water. This prevents the resurfacer from drying too quickly.
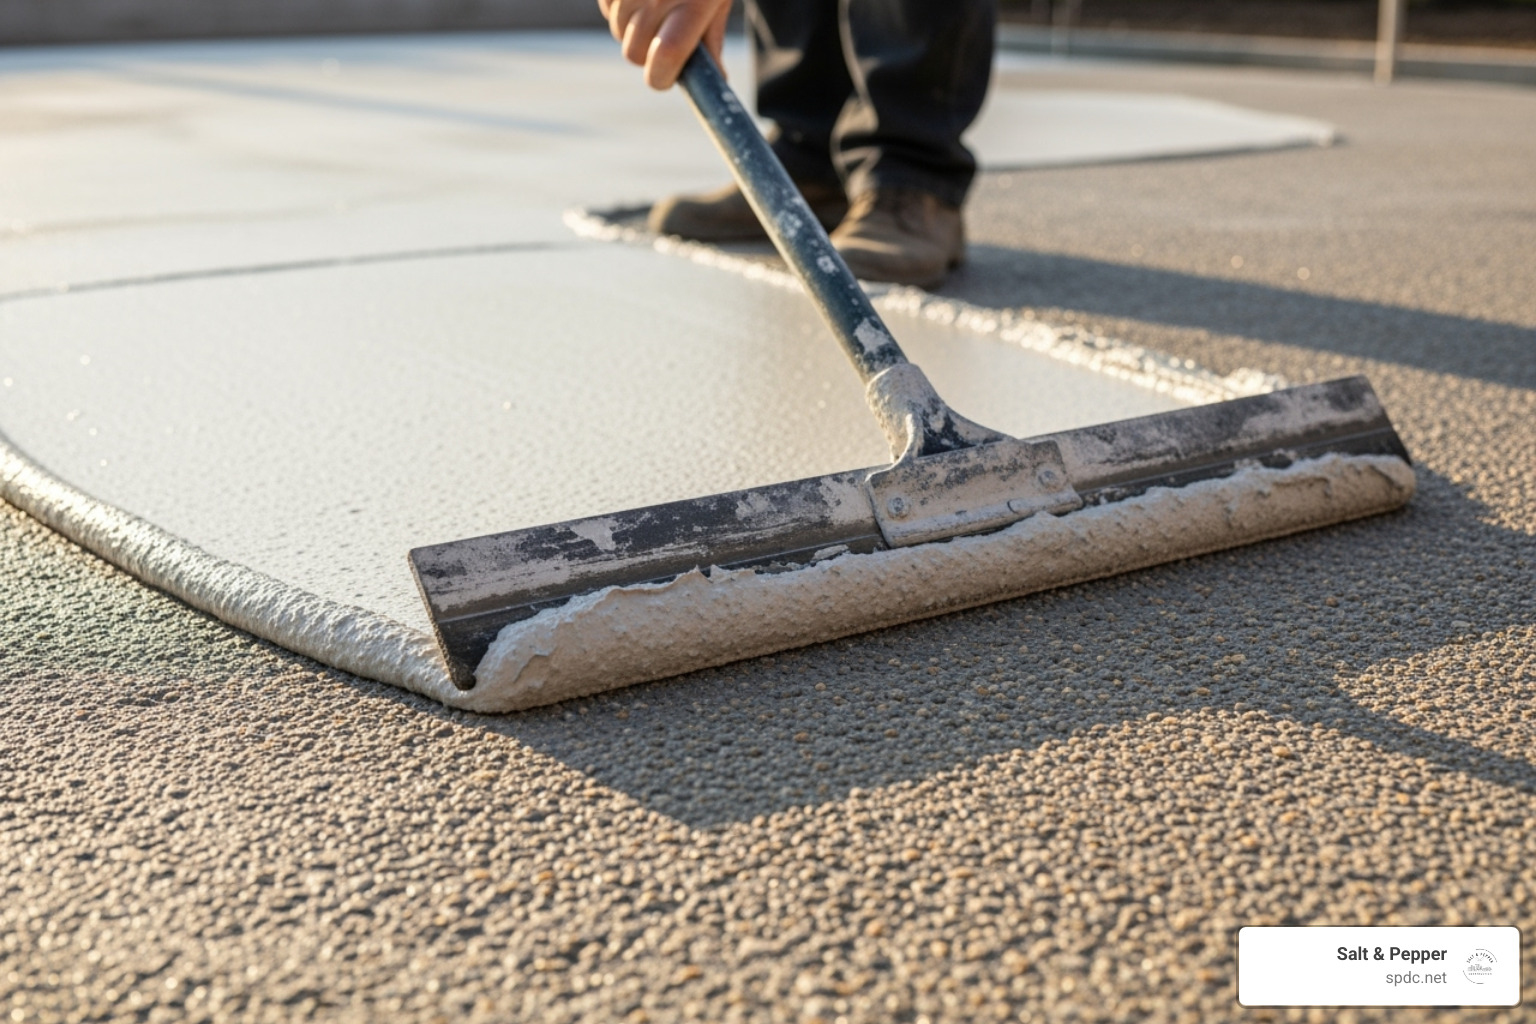
Mixing the resurfacer requires precision. Follow the manufacturer’s water-to-mix ratio exactly – too much water weakens the final product, while too little makes it impossible to spread. Use a paddle mixer attached to a drill for best results. You want a consistency similar to thick pancake batter that flows easily but isn’t runny.
Application technique is where the magic happens. Pour the mixed resurfacer onto your prepared slab in manageable sections. Use a long-handled, stiff-edged rubber squeegee to spread it evenly across the surface. Work quickly but don’t panic – you have a reasonable working time. The key is avoiding overworking the material. Once it’s spread, resist the urge to keep fussing with it.
For added safety, especially on patios or pool decks, create a broom finish by lightly dragging a clean concrete broom across the fresh resurfacer in parallel lines. This creates a non-slip textured surface.
Curing time determines your repair’s longevity. Apply concrete curing compound immediately after finishing, or keep the area continuously moist by misting and covering with plastic for at least three days. You can usually walk on it after 4 hours, but wait a full week before allowing vehicle traffic.
With proper technique and patience, these DIY methods can handle most minor to moderate concrete issues. But remember – there’s no shame in calling professionals for major structural problems or when you’re in over your head.
Advanced & Permanent Repair Solutions
Sometimes a simple patch job just won’t cut it. When you’re dealing with serious structural issues or want a repair that’ll outlast your mortgage, it’s time to bring out the heavy-duty solutions. These advanced techniques might sound fancy, but they’re designed to solve problems once and for all – no more Band-Aid fixes that fail after the next rainy season.
At Salt & Pepper, we’ve seen too many homeowners spend money on temporary fixes only to face the same problems again in a few years. That’s why we believe in doing things right the first time. These permanent solutions restore your concrete’s structural integrity and give you the peace of mind that comes with knowing your concrete slab repair will stand the test of time.
Modern technology has revolutionized how we approach concrete repair. We’re not just filling holes anymore – we’re engineering solutions that make your concrete stronger than it was originally. These methods often require specialized equipment and expertise, but the results speak for themselves. Check out our comprehensive Services to see how we can help transform your concrete problems into permanent solutions.
The Power of Carbon Fiber Reinforcement
Here’s the thing about traditional crack repair: you’re basically putting a Band-Aid on a broken arm. You fill the crack with concrete or epoxy, but you haven’t addressed why it cracked in the first place. Concrete is incredibly strong under compression but weak when pulled apart – that’s why it cracks.
Carbon fiber reinforcement changes the game completely. Instead of just filling the crack, we’re actually stitching the concrete back together. Think of it like performing surgery with super-strong thread that never breaks down.
Products like the RHINO Carbon Fiber Concrete Crack Lock provide incredible tensile strength right where your concrete needs it most. This stuff is so strong it’s used on bridges and skyscrapers. The best part? It’s completely non-corrosive, so you don’t have to worry about rust or deterioration like you would with steel reinforcement.
The process is surprisingly straightforward. We clean out the crack, apply the carbon fiber reinforcement across the damaged area, and secure it with high-strength adhesive. The carbon fiber essentially prevents the crack from ever opening again by holding the concrete together under tension. It’s like giving your concrete superpowers.
This isn’t just crack stitching – it’s structural reinforcement that actually makes your slab stronger than it was originally. When we use carbon fiber for concrete slab repair, we’re not just fixing a problem; we’re preventing future movement and ensuring the entire slab maintains its integrity for decades to come.
How Concrete Coatings Affect Your Concrete Slab Repair
Let’s talk about one of the biggest mistakes we see homeowners make: applying beautiful concrete coatings over damaged slabs. It’s like putting lipstick on a pig – it might look good initially, but those underlying problems are going to show themselves eventually.
Here’s what happens when you skip proper repair before coating. Those cracks you thought you could hide? They’ll “telegraph” right through your expensive coating, creating unsightly lines that ruin the whole look. Even worse, moisture can seep through those cracks and get trapped under the coating, leading to bubbling, peeling, and even mold growth.
Protective coatings and decorative finishes are fantastic investments – but only when applied over properly repaired concrete. We always insist on thorough concrete slab repair before any coating goes down. It’s not just about aesthetics; it’s about protecting your investment.
Most reputable coating manufacturers actually require mechanical reinforcement of cracks before they’ll honor their warranty. They know that unreinforced cracks will eventually compromise the coating system. By addressing structural issues first with proper reinforcement, we ensure your coating adheres correctly and provides the long-lasting protection and beauty you’re paying for.
The good news is that properly repaired concrete provides the perfect foundation for any coating system. Whether you want a simple protective sealer or an elaborate decorative finish, starting with a structurally sound slab means your coating will look better and last longer. It’s all about building from a solid foundation – literally.
Frequently Asked Questions about Concrete Repair
Over the years, I’ve helped countless Tampa homeowners steer their concrete slab repair challenges. These are the questions that come up most often during our consultations – and honestly, they’re great questions that get to the heart of what really matters when fixing concrete.
How can I ensure a long-lasting concrete slab repair?
The secret to repairs that actually last isn’t just about using good materials – though that certainly helps. It’s about understanding why your concrete cracked in the first place and fixing the real problem, not just the symptom.
Proper diagnosis is everything. If your driveway is cracking because the soil underneath is washing away, simply filling those cracks with more concrete is like putting a band-aid on a broken bone. The soil issue will cause new cracks to appear, often right next to your “repair.”
Thorough preparation makes or breaks your repair. I can’t stress this enough – any dirt, loose concrete, or old repair material will prevent the new patch from bonding properly. Think of it like trying to glue two pieces of wood together without cleaning off the sawdust first. It might hold for a while, but it won’t last.
Using the right materials for your specific problem is crucial too. A flexible sealant works great for a crack that’s still moving slightly, but it won’t help with spalling concrete. Meanwhile, a rigid patching compound is perfect for filling holes but terrible for active cracks.
The curing process is where many DIY repairs go wrong. Concrete needs time and moisture to reach its full strength. Rushing this step by letting it dry too fast often leads to weak, brittle repairs that fail within months.
Most importantly, you must address the root cause. Poor drainage? Fix it. Tree roots pushing up your patio? Deal with them. Unstable soil? That needs attention too. Skip this step, and you’ll be doing the same repair again next year.
What are the key differences between temporary and permanent repair solutions?
This is where I see homeowners get frustrated – they patch a crack, and six months later, it’s back. Understanding the difference between a quick fix and a lasting solution can save you time, money, and a lot of headaches.
Temporary fixes are essentially cosmetic band-aids. They make the problem disappear visually, but they don’t add any real strength to the concrete or stop the forces that caused the damage. Simple crack fillers, basic concrete patches, and standard epoxy injections fall into this category. They’re like putting tape over a crack in your windshield – it might look better, but the underlying weakness is still there.
These quick fixes often fail because they don’t resist the movement or pulling forces that created the original crack. When that crack wants to open up again – and it will – your patch becomes the weak point and fails first.
Permanent solutions take a completely different approach. They focus on structural bonding and reinforcement, actually making the repaired area stronger than it was before. Carbon fiber reinforcement, for example, doesn’t just fill a crack – it stitches the concrete back together with incredible tensile strength.
For sunken slabs, permanent fixes like slabjacking or polyjacking don’t just level the surface – they address the void underneath that caused the sinking. These methods are designed to resist the same forces that caused the original damage.
Yes, permanent solutions typically cost more upfront. But when you factor in not having to redo the repair every few years, plus preventing more serious damage, they’re almost always the better investment.
When should I call a professional instead of DIY?
While DIY can be satisfying, some concrete slab repair situations require a professional due to safety risks and the need for specialized equipment. Here’s when to call for help:
Large structural cracks: Cracks wider than a quarter-inch or where one side is higher than the other signal serious problems like foundation settlement or soil issues that need professional assessment.
Sunken slabs: Lifting concrete requires specialized techniques. A failed DIY attempt can crack the slab, damage utilities, or make the surface more uneven. The underlying cause must also be addressed professionally.
Foundation issues: Never attempt to DIY foundation repairs. Even small cracks can indicate serious problems that threaten your home’s structural integrity and require immediate expert attention.
Extensive damage: If you have widespread spalling, interconnected cracks, or crumbling concrete, the slab may be beyond simple patching. A pro can determine if resurfacing is an option or if replacement is necessary.
When you’re not confident: If you’re unsure about the diagnosis or repair, it’s best to call a professional. For complex projects, experienced Construction Companies in Tampa, FL can handle the job safely and effectively. A professional opinion is much cheaper than fixing a botched DIY repair.
Conclusion
Taking care of your concrete doesn’t have to be overwhelming. The key to successful concrete slab repair is catching problems early and choosing the right approach for your specific situation. Whether you’re dealing with a hairline crack that needs simple filling or facing more serious structural issues, addressing these problems quickly protects both your safety and your wallet.
Think about it this way – your concrete slabs are like the foundation of your outdoor living spaces. A cracked patio isn’t just an eyesore; it’s a tripping hazard waiting to happen. Water seeping through those cracks can wash away soil underneath, leading to even bigger problems down the road.
Property value matters too. Well-maintained concrete adds serious curb appeal to your home. Potential buyers notice clean, smooth driveways and patios. On the flip side, cracked and uneven surfaces can be major red flags that suggest neglect or underlying structural issues.
The DIY approach works great for minor repairs – those small cracks and surface spalling we talked about earlier. There’s real satisfaction in fixing these yourself, plus you’ll save money and learn valuable skills. But don’t bite off more than you can chew. Large structural cracks, sunken slabs, or foundation-related issues need professional expertise and specialized equipment.
At Salt & Pepper, we’ve seen how proper concrete slab repair transforms outdoor spaces during our Tampa home renovations. Whether we’re working on a complete backyard makeover or a kitchen expansion that includes new patio access, we know that solid, attractive concrete is essential to the finished project.
Our approach combines innovative design thinking with quality craftsmanship. We don’t just patch problems – we solve them permanently while making sure everything looks beautiful and functions perfectly for years to come.
Ready to tackle those concrete issues? Contact our Tampa pavement constructors for a consultation and let’s discuss the best solution for your specific needs. Your concrete deserves the same attention to detail we bring to every kitchen remodel and room addition.


